Pico-8 for non technicals
What is Pico-8?
Pico-8 is a small environment that lets you create console games in retro style. It’s nice because once you have done with your game development, you can share cartridges or run them in a small emulator on your webpage. :)
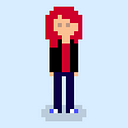
Reading this article you will be able to draw and animate a cute character making it run all around the game screen.

Getting started
Pico-8 comes with an integrated sprite-editor, music editor and code editor. You can input LUA instructions within the code editor and develop your game. To access those editors, just press ESC when you are in the program main menu.
Help! I’m totally new, what is a sprite?
A sprite in just a 2D image moving independently on the screen.
But how does the game loop work?
Pico-8 game loop runs 30 times per second, keeping the display updated and rendering animations.
To handle the entire lifecycle of the animation you can count on these (mandatory to be implemented) methods:
- _init(): here you can define something like actors’ initial positions.
- _update(): here you write the code defining what’s going on in the next frame.
- _draw(): actually draw the character at the next position.
Planning the concept
To begin take a simple game concept: just an actor going around the screen, guided by keyboard buttons.
Planning the algorithm
Here’s a list of things you are going to care of:
- Clear the screen
- Draw a character at a predefined initial position (_init())
- Intercept keyboard button pressure (_update())
- Draw character in the new position (_draw())
Behind the animation
What’s the concept behind the animation?
Imagine a square sheet, like the one you can find in a common exercise book, with a ruler on the top of it.
You can use a sequence of those squares in a row to define states in an animation. For example, in the first square you can draw the character with the left leg up, in the second one the character with both legs down and in the third the character with the right leg up.
Defined a square size of 1x1cm, you can tell: “Hey, get the content of the square at cm1 and then that of the square at cm2 and then that of the square at cm3. When you’re done, get back to get the content of the square at cm1”. If you think about it, that’s your animation!
You aren’t going to use cm to define animations on screen but that’s a good analogy!
Draw a character
Open the sprite editor.

Just a brief note on the interface: your sprite size can vary, so you can use the slide control to change its size. 😉
Draw each animation state in sequential squares, as suggested in “Behind the animation” paragraph (and please note, in the example the selected sprite number is the one in the tag near the bucket tool).
Coding the game
Now open the code editor.

Copy the following snippet into the editor:
Here you just define a player structure and update its position when buttons are pressed: can you image which button is which? 😉
In the _draw() function, spr() draws the sprite at the updated position.
Note: the character can still fall out of the scene.
When you’re done, press ESC to get back to the main prompt interface.
Save the work by typing:
SAVE MYGAME.P8Later you can reload the cartridge by typing:
LOAD MYGAME.P8Ready? Go!
Type:
RUNand…run, run, run! 🙌